

Step-by-Step Guide To Create A Custom Lightning Record Page In Salesforce
There are two ways to create a custom lightning record page in Salesforce: through the lighting app builder and the lighting application.
Creating Custom Lightning Record Page With Lighting App Builder
In order to develop a custom lightning record page using the lightning app builder, follow the steps mentioned below.
Step 1: Firstly, log in to your existing Salesforce account and open the Setup page.
Step 2: Enter ‘app builder’ in the quick find box. You will see ‘Lightning App Builder’ in the dropdown window.
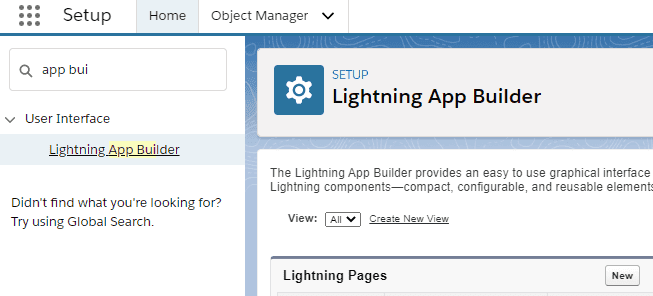
Step 3: Scroll down and click on the ‘New’ button next to the ‘Lighting Pages’ option.
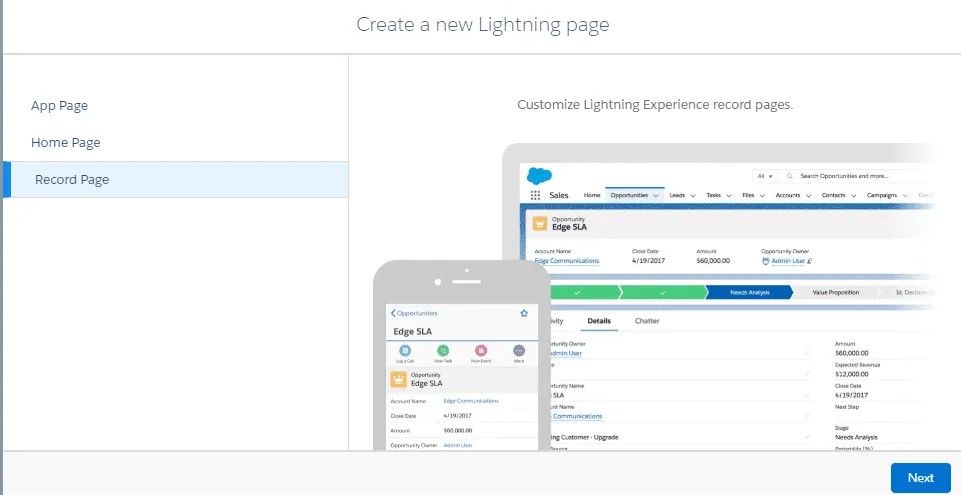
Step 4: You will be redirected to a new window. Now, click on the ‘Record Page’ option, which you can see on the top-left screen. Tap on the ‘Next’ button at the bottom-right screen.
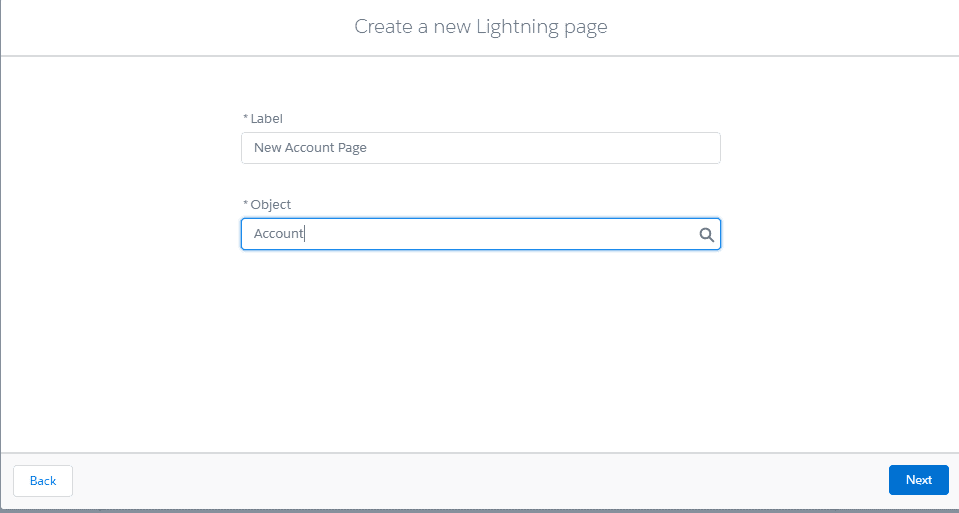
Step 5: A new window will pop up. You need to enter the label and choose an object. For example, if you choose ‘Contact Record Page’ as the label, then the object should be ‘Contact.’ Tap on the ‘next’ button.
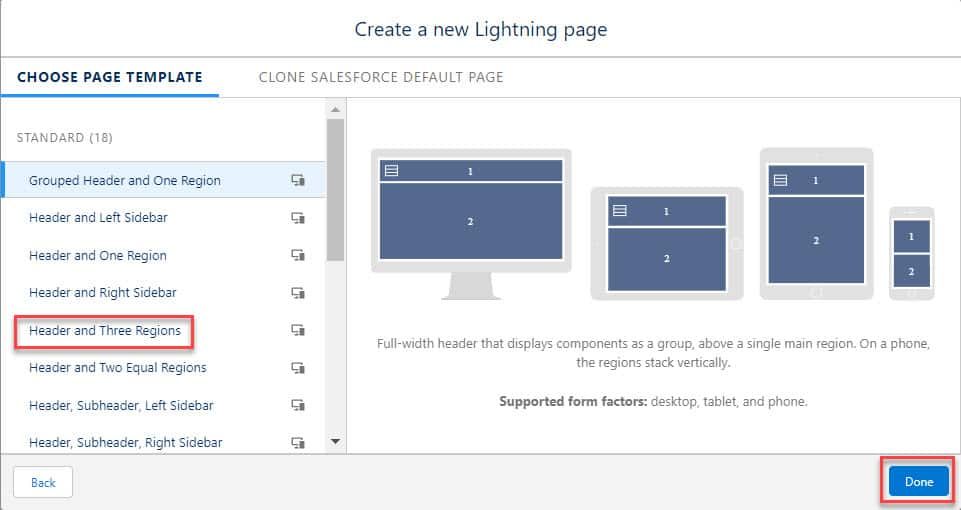
Step 6: Now, you need to choose the template for the custom record page from the standard page templates. You can click on the ‘Header and Right sidebar’ option. Then tap on the ‘Finish’ button at the right side bottom of the screen.
Step 7: In this new window, you need to add standard components to the page template. For that, you should select the components from the left-side screen and drag them to the template region.
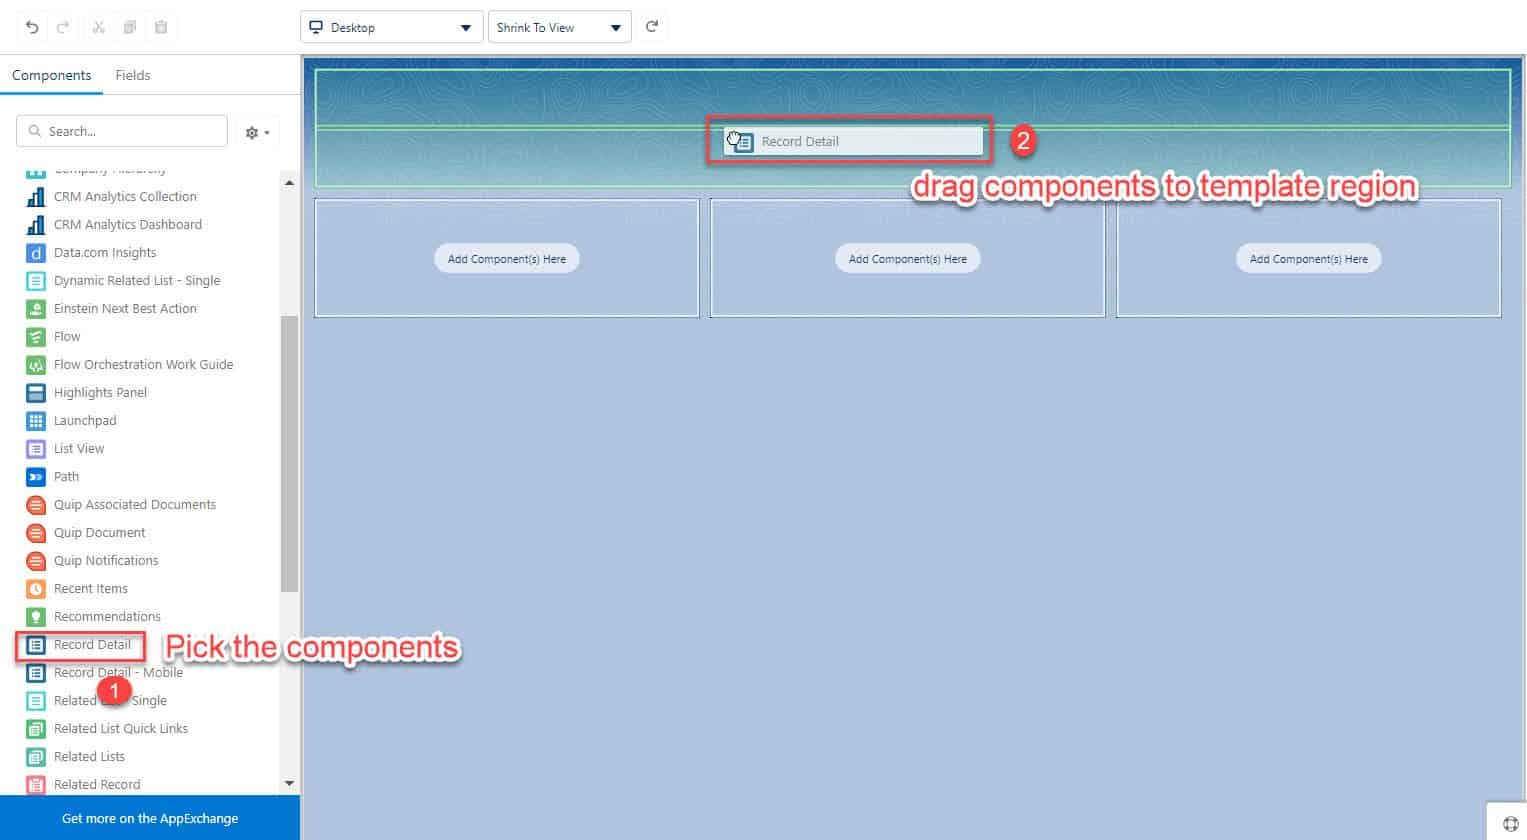
Step 8: For the ‘Header and Right sidebar’ template, there are three regions, so you can select three components
- Add the ‘CRM Analytics Dashboard’ component as the header of the page.
- Drag the ‘Launchpad’ component to the lower left region.
- Drag the 'List View’ component to the lower right region.
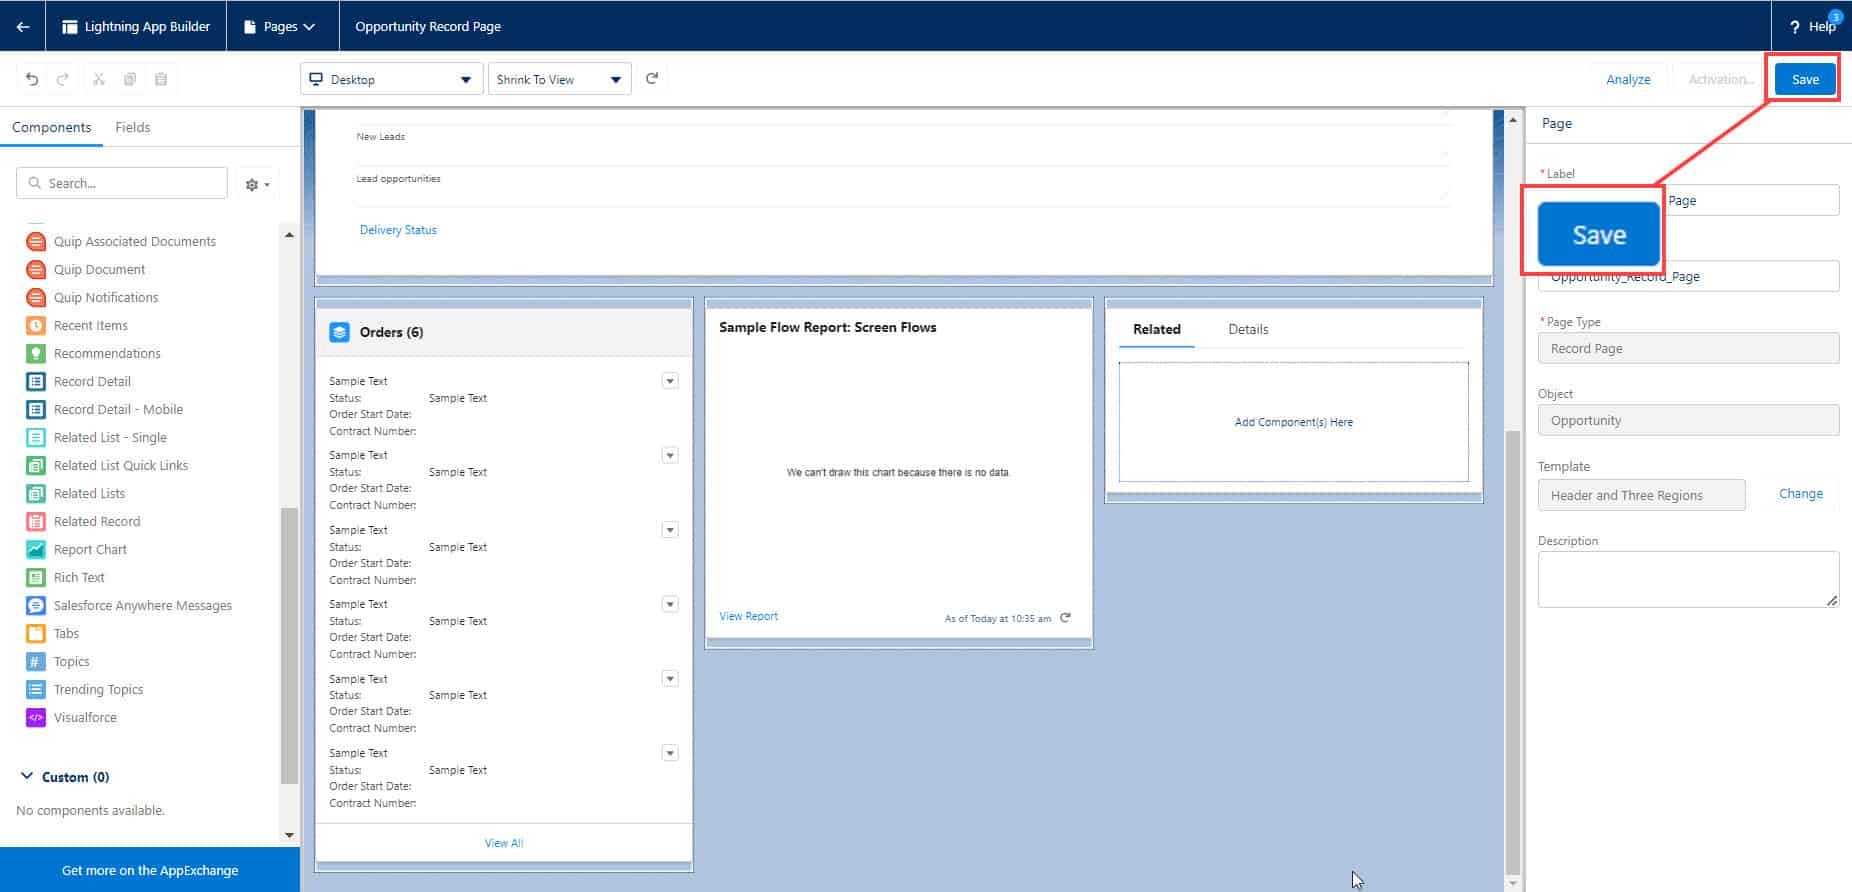
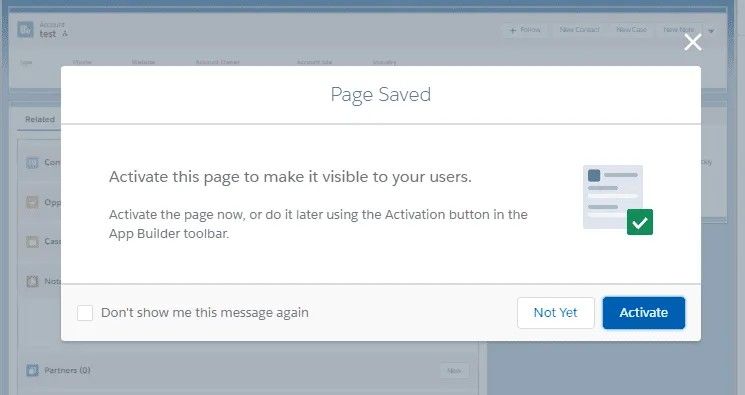
Step 9: After adding the components to the temple, tap on the ‘Save’ button at the top-right of the screen. A new pop-up window will appear, and tap on the ‘Activate’ button.
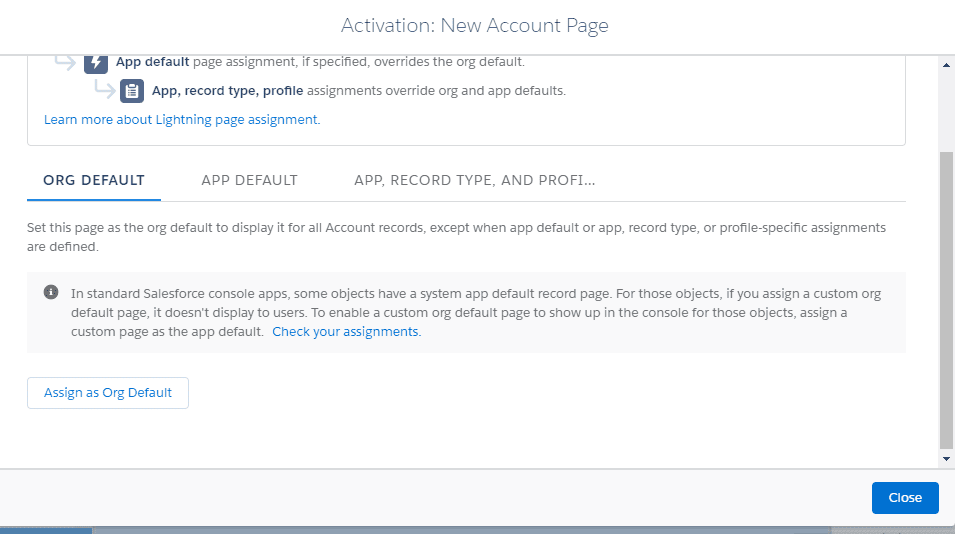
Step 10: In this new window, tap on the ‘Assign as Org Default’ option, which you can see at the bottom-left screen. This will make the record page as organization default.
Step 11: Now, tap on the ‘Desktop,’ ‘Phone,’ or ‘Desktop and Phone’ option. Click on the ‘Next’ button.
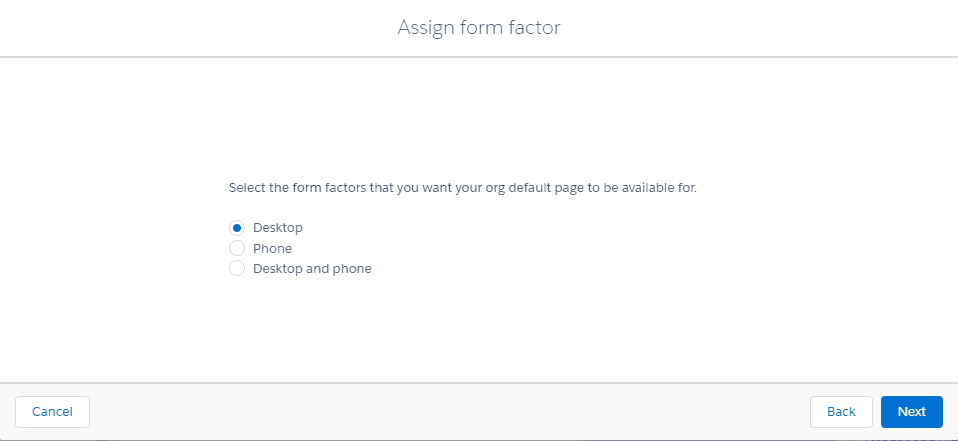
Step 12: Tap on the ‘Back’ button.
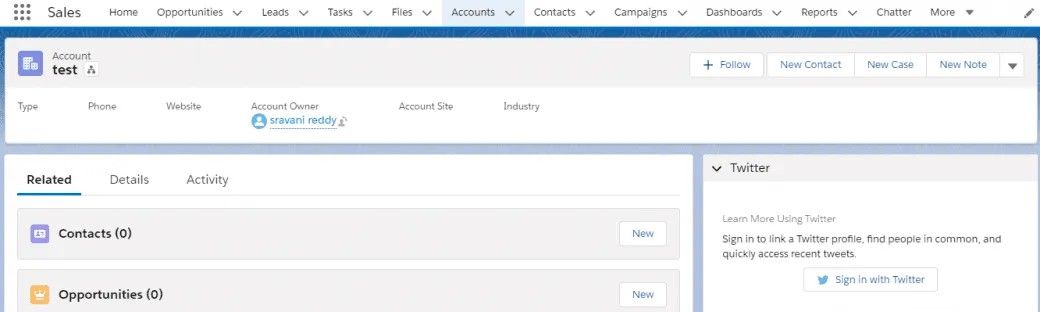
Step 13: Now, go to the app launcher. Choose the ‘Contacts’ tab from the menu. This is how the contacts page will appear for the customers.
Creating Custom Lightning Record Page With Lighting Application
Here is how you can create a custom lightning record page in Salesforce with a lighting application. Follow these steps.
Step 1: To use the lightning application, you need to have a Salesforce developer account.
Step 2: Log in to your account and go to the setup page. At the top-left side, you can see the ‘Quick Find’ box.
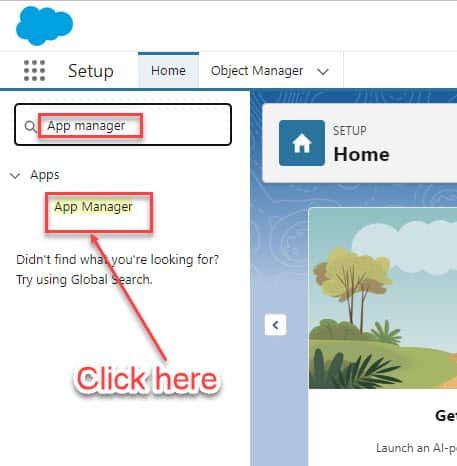
Step 3: Enter ‘App Manager’ in the ‘Quick Find’ and tap on the ‘App Manager’ option from the dropdown screen.
Step 4: In this new window, you can see numerous Salesforce Lightning and Classic applications on the screen.
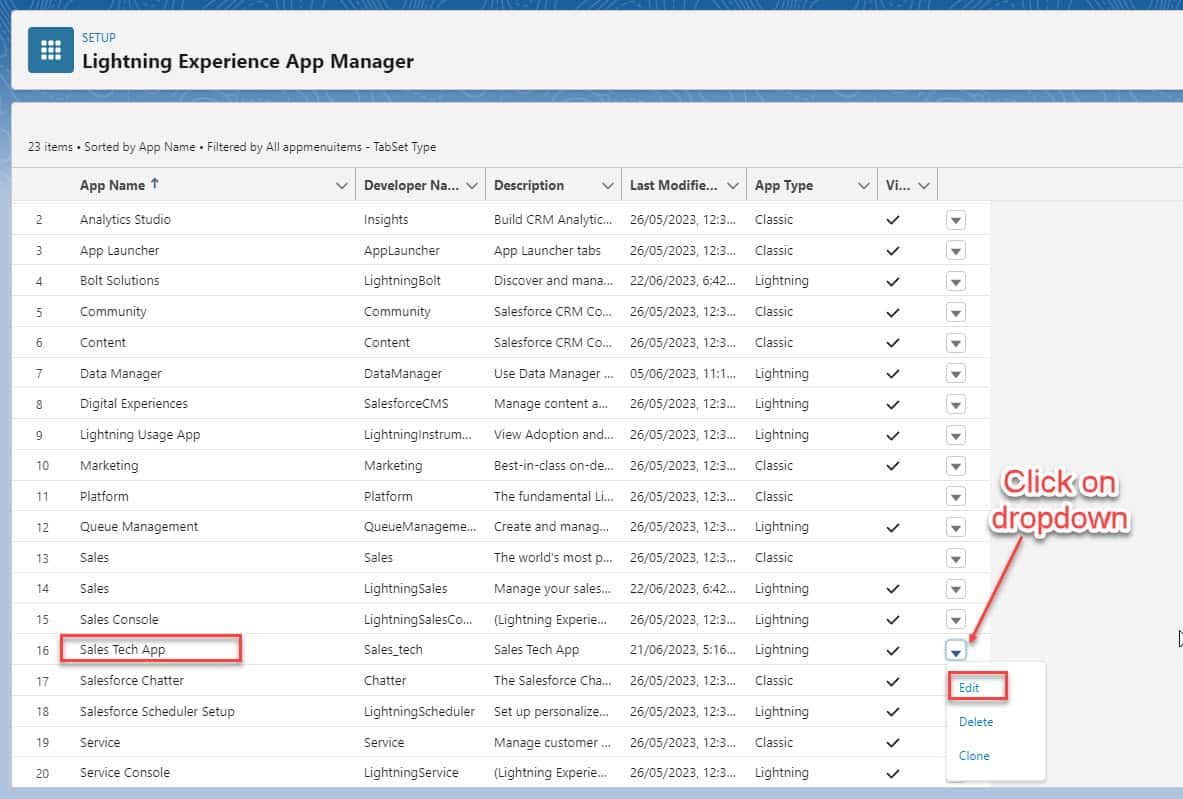
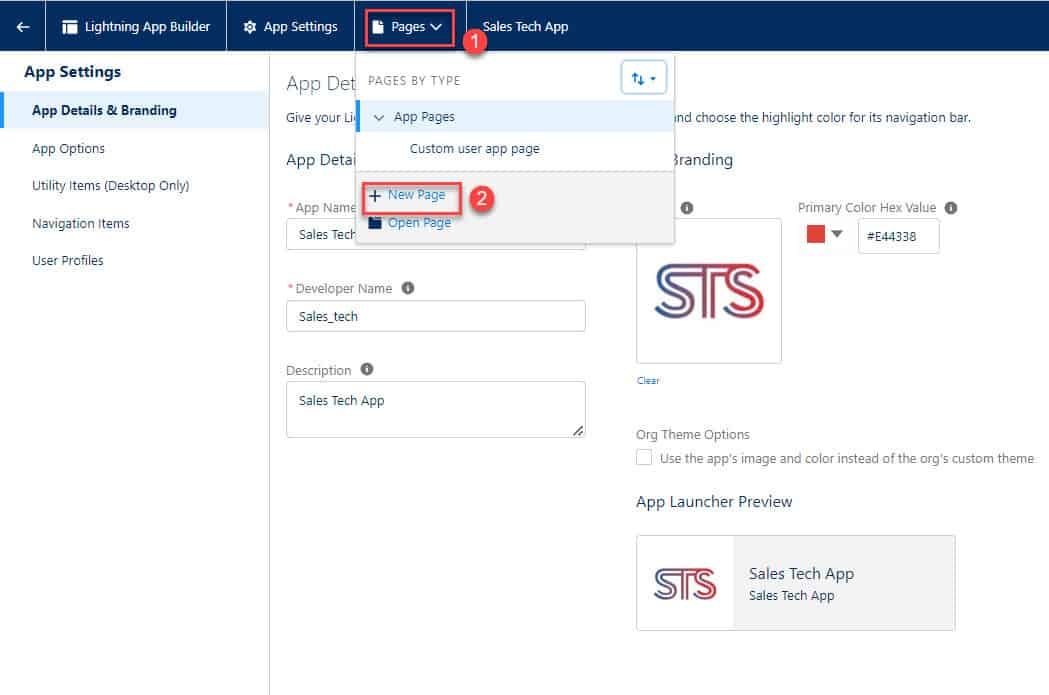
Step 6: Now, the ‘Sales Tech App’ will open in the lightning app builder. At the top of the screen, click on the ‘Pages’ tab and tap on the ‘New Page’ button from the dropdown menu.
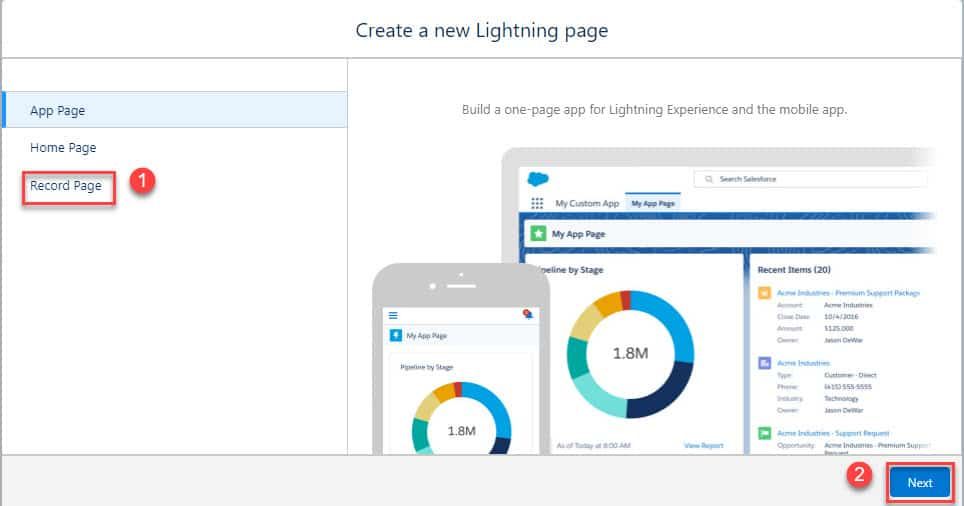
Step 7: You will be redirected to a new window. Now, click on the ‘Record Page’ option, which you can see on the top-left screen. Tap on the ‘Next’ button at the bottom-right screen.
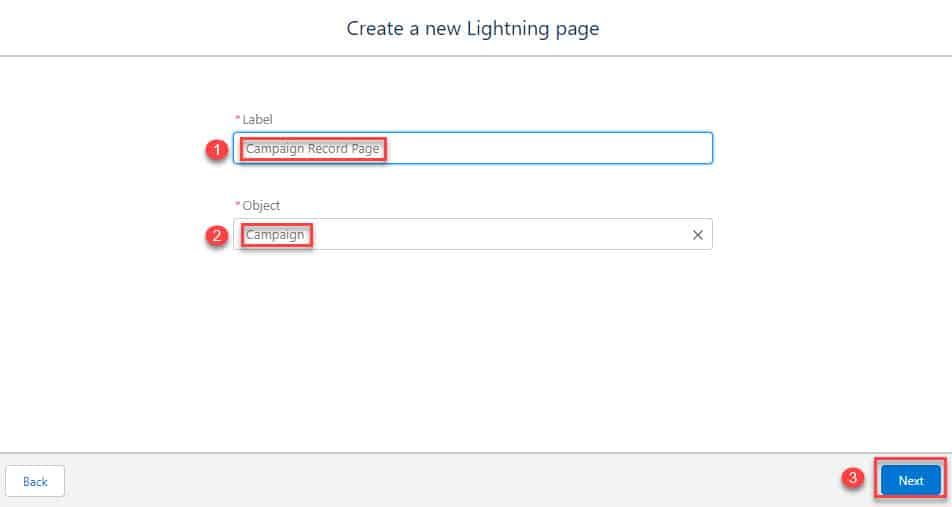
Step 8: A new window will pop up. You need to enter the label and choose an object. For example, if you choose ‘Campaign Record Page’ as the label, then the object should be ‘Campaign.’ Tap on the ‘next’ button.
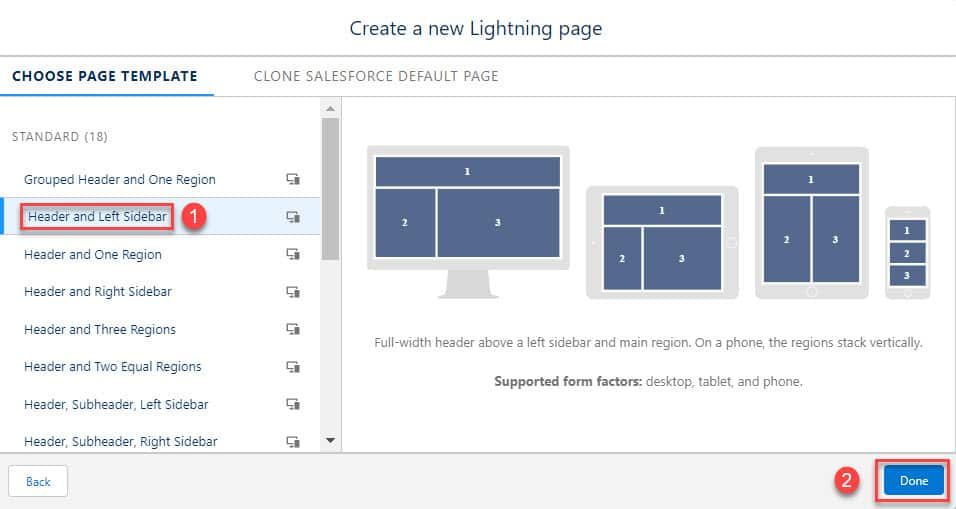
Step 9: Now, you need to choose the template for the custom record page from the standard page templates. You can click on the ‘Header and three regions’ option. Then tap on the ‘Done’ button at the bottom right side of the screen.
Step 10: In this new window, you need to add standard components to the page template. For that, you should select the components from the left-side screen and drag them to the template region.
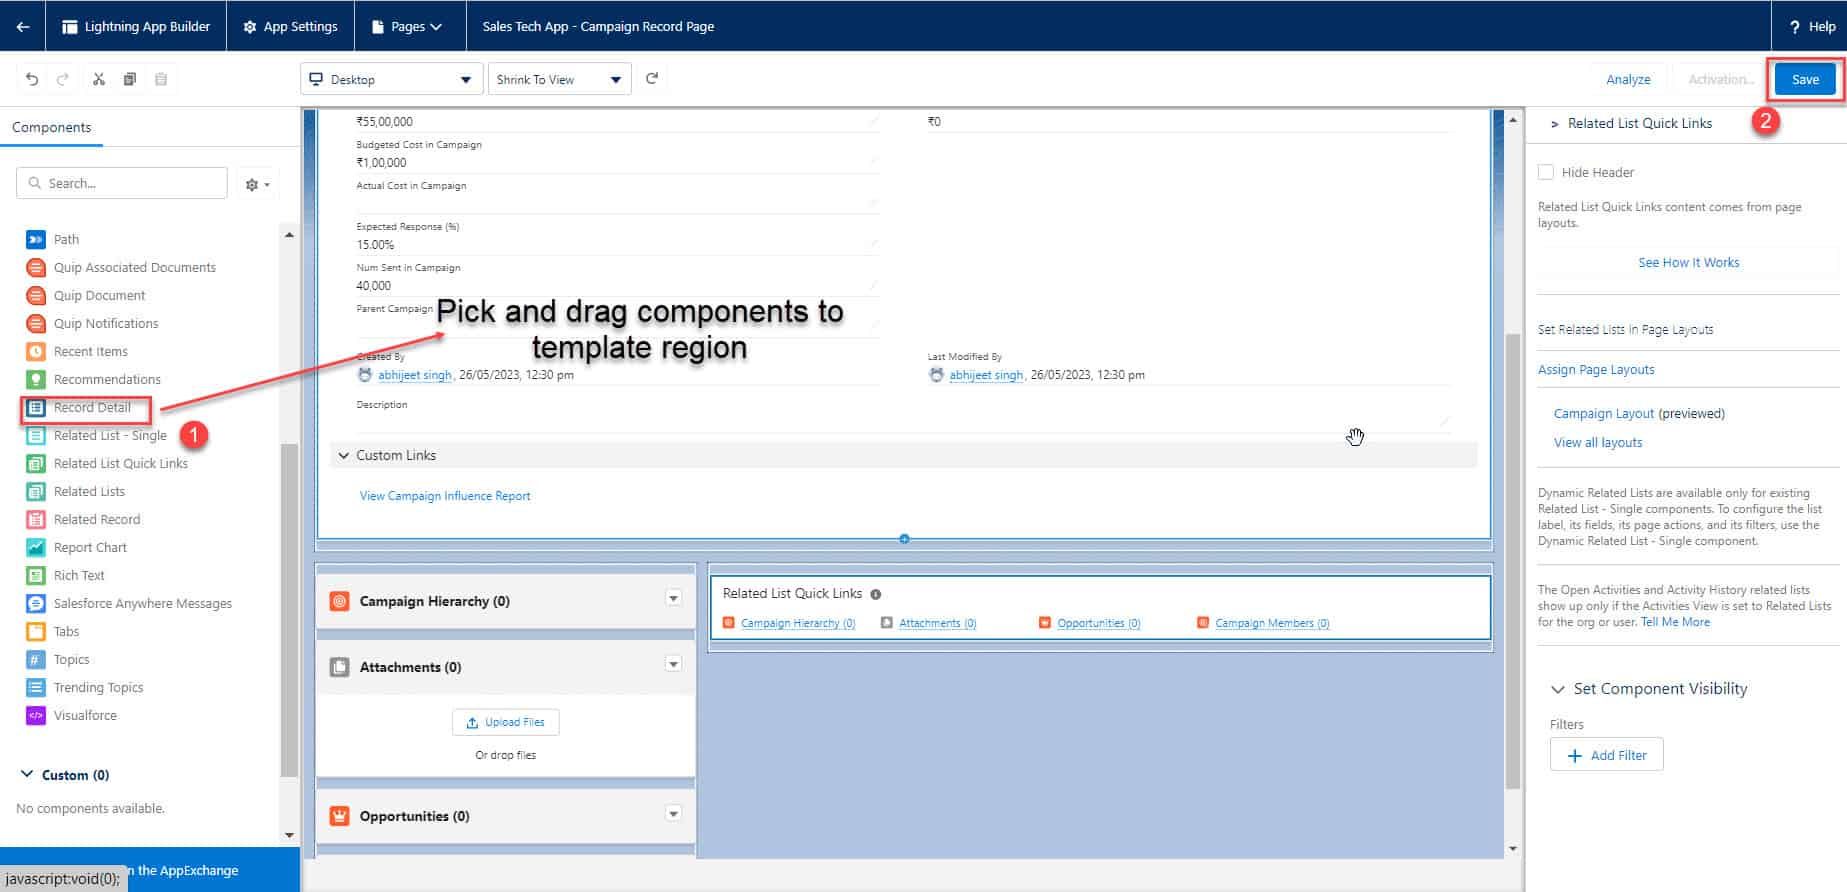
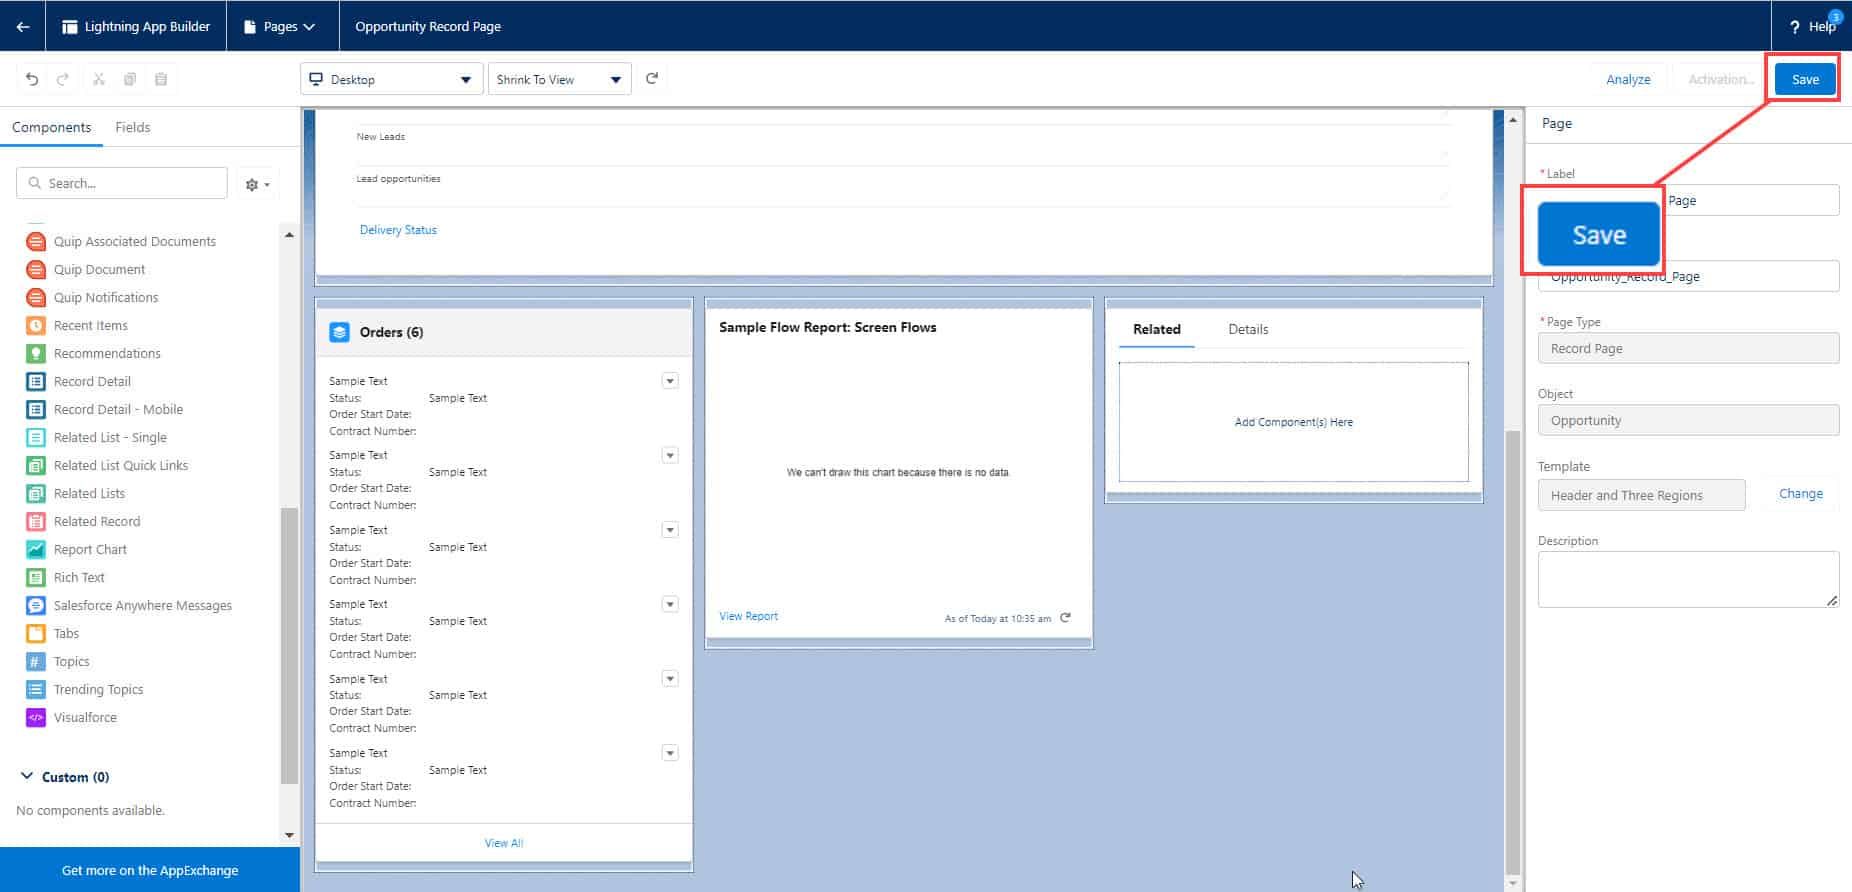
Step 11: After adding the components to the temple, tap on the ‘Save’ button at the top-right of the screen. A new pop-up window will appear, and tap on the ‘Activate’ button.
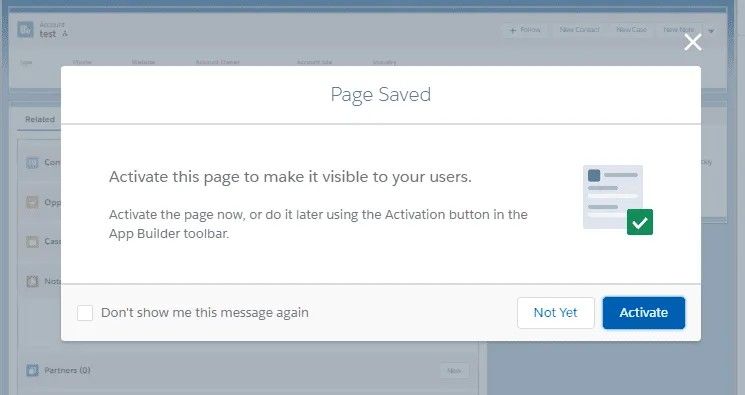
Step 12: In this new window, tap on the ‘Assign as Org Default’ option, which you can see at the bottom-left screen. This will make the record page as organization default.
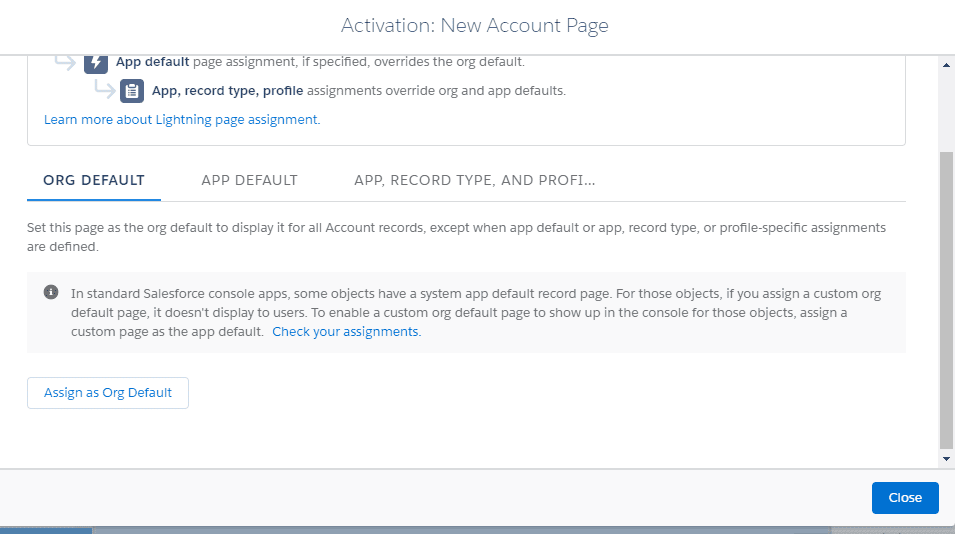
Step 13: Now, tap on the ‘Desktop,’ ‘Phone,’ or ‘Desktop and Phone’ option. Click on the ‘Next’ button.
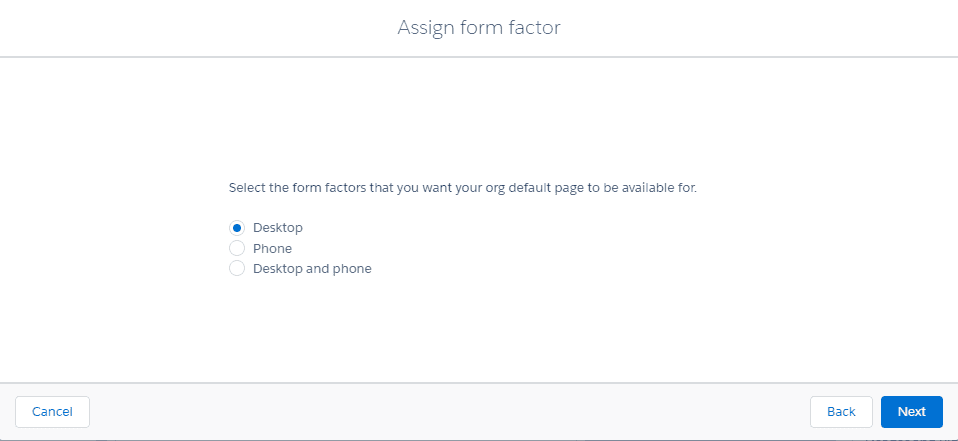
Step 14: Tap on the ‘Back’ button.
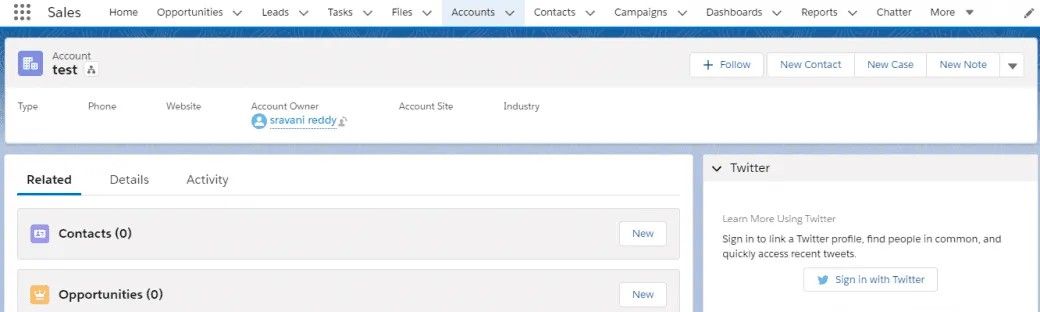
Step 15: Now, go to the app launcher. Choose the ‘Campaign’ tab from the menu. This is how the campaign page will appear for the users.
Bottom Line
Creating a custom lightning record page is relatively easy and can be done within minutes using the lighting app builder or lighting application. Customizing the record page design can make it more flexible, and users can add or remove the components that suit their preferences. We hope the above-listed methods are helpful for you in creating a lightning record page in Salesforce.
FAQs
1. What are the different types of lightning pages in Salesforce?
In Salesforce, lightning pages are customized layouts that can be used for designing pages. The record page, home page, and app page are the different types of lightning pages in Salesforce.
2. How to use Lighting App Builder to create a page in Salesforce?
To create a page in Salesforce, login to your Salesforce account, search for App Builder, and choose the Lighting App Builder option. Click on the new button and choose the type of page. That's it, you created a new page using Lighting App Builder.
3. What are the primary differences between page layouts and lightning record pages?
For lightning record pages, you can rearrange the field sections and related lists and add rich text components, path, dynamic form, sub-tabs, etc., which is not possible for page layouts.
References
https://www.appseconnect.com/salesforce-lightning-experience-how-to-build-custom-pages/