

This comprehensive companion delves into configuring your domain with Amazon Route 53, empowering you to take complete control over your domain's routing and address. We will navigate the entire process, from understanding core DNS concepts to creating various record types for directing business to your resources.
Demystifying DNS: The Backbone of Online Navigation
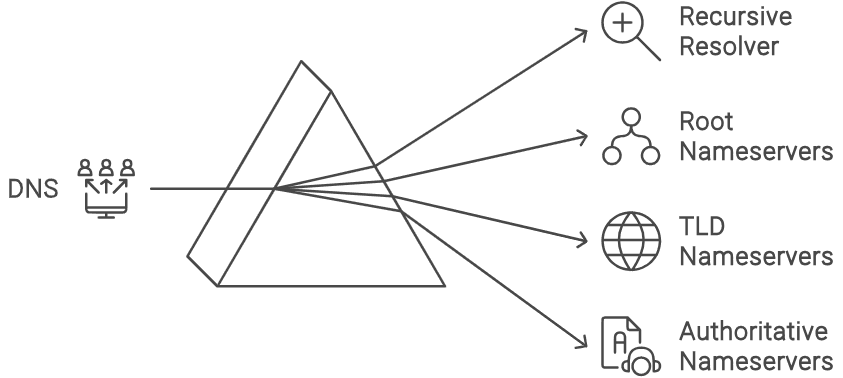
Recursive Resolver
The user's computer first connects to its designated recursive resolver, frequently handed out by their internet service provider( ISP).
Root Nameservers
This resolver queries the root nameservers, the authoritative source for top-level domains (TLDs) .com or .org.
TLD Nameservers
The root nameservers also direct the resolver to the nameservers responsible for the specific TLD.
Authoritative Nameservers
Ultimately, the TLD nameservers point the resolver to the definitive nameservers for your domain, which hold the factual mapping between your domain name and its IP address (es). Route 53 acts as your definitive nameserver, allowing you to outline how your domain name resolves and directs business. Now, after getting a basic understanding of the mechanism that works behind Route 53. Let's start setting up your domain with Route 53. Following is a step-by-step guide to setup the domain.
Log in to the AWS Management Console
Firstly, Go to the AWS Management Console (https://aws.amazon.com/console/) and sign in with your AWS credentials.
Navigate to Route 53 Service
Within the console, search for" Route 53" in the search bar and select the service to access its main dashboard.
Create a Hosted Zone
A hosted zone represents a virtual container for all your DNS records related to a specific domain. Click on" Create Hosted Zone" to initiate the creation process.
Enter Your Domain Name
In the" Domain Name" field, enter the domain name that must be configured with Route 53. Ensure you bought the domain name from a domain register beforehand.
Specify Zone Type (Public or Private)
Choose the applicable zone type based on your requirements. Public zones are for domains accessible to the internet, while private zones are for internal resources within your AWS Virtual Private Cloud( VPC).
Mastering Record Types: Directing Traffic with Precision
This is the most fundamental record type, and it maps a domain name(e.g.,www.example.com) to your web server's IPv4 address(e.g.,192.168.1.100).
AAAA Record
Similar to A records, but for IPv6 addresses, the next-generation internet protocol.
CNAME Record
Creates an alias for another domain name, directing business to the CNAME's target domain.
MX Record
Pivotal for dispatch routing specifies the correspondence exchange servers responsible for handling incoming emails for your domain.
NS Record
Used for delegation purposes, it points to the authoritative nameservers for a subdomain within your hosted zone.
ALIAS Record
A Route 53-specific record type allows you to direct business to resources within Route 53 services, such as Amazon S3 pails or Amazon CloudFront distributions.
Additional Considerations
Route 53 Health Checks
For resources like Elastic Load Balancers, you can integrate Route 53 Health Checks to cover the health of your backends. Route 53 can also route business only to healthy cases within the load balancer.
Weighted Routing
For resources like Elastic Load Balancers, you can integrate Route 53 Health Checks to cover the health of your backends. Route 53 can also route business only to healthy cases within the load balancer.
Failover Routing
Configure failover routing to automatically deflect business to a secondary resource if your primary resource becomes unapproachable. By effectively exercising these record types and functionalities, you can produce a robust and flexible DNS configuration for your domain using Route 53.
Integrating with Your Domain Registrar
Once you've created your hosted zone and configured record sets in Route 53, the final step is to modernize your domain register's settings to point your domain name to Route 53's nameservers. This process varies slightly depending on your register. Look for options to manage DNS records or nameservers within your register's control panel. Locate the nameservers handed by Route 53 for your hosted zone (set up on the hosted zone details page). You will generally need to replace the existing nameservers with these Route 53 nameservers.
DNS Done Right: A Secure and Scalable Future with Route 53
Configuring your domain with Amazon Route 53 empowers you to take control of your online presence. This companion has equipped you with the knowledge to produce colorful record types, integrate with your domain registrar, and maintain a robust DNS configuration. As you explore further, influence Route 53's advanced features to optimize business inflow, enhance user experience, and ensure the flawless operation of your web operations and resources. Remember, a well-configured DNS is the foundation for a dependable and accessible online presence. With Route 53, you have the tools and knowledge to build a solid digital domain foundation.